Monday, December 23, 2013
How to Tie the {Perfect} Bow!
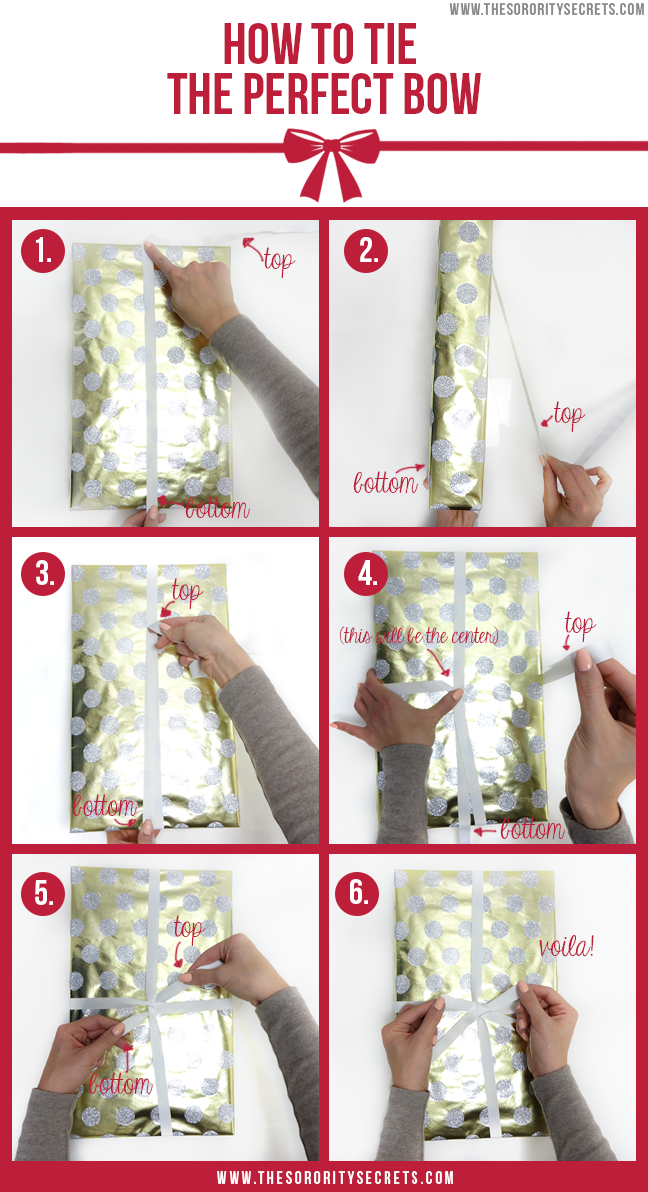
We have been getting tons of requests on how to tie the perfect bow so we thought we would make an easy step-by-step tutorial on how to tie the perfect bow on your gifts! One thing to keep in mind when tying a bow is it requires more ribbon than you would think so make sure you have enough ribbon!
Step 1: Measure
Place your left thumb on the bottom of the gift, place the ribbon across the box and use your index finger at the top. **Important Step** Slide your your right index finger to the bottom of the box to add more ribbon towards the bottom, place your left thumb at the bottom of the box again.
Step 2: Wrap-Around
Keep your left thumb on the bottom of the box and wrap the top ribbon around the box.
Step 3: The Placement of the Bow
After wrapping around the ribbon around the box, place the top of the ribbon (the one in your right hand) to the center where you would like the bow to be.
Step 4: Wrap-Around #2
Flip over the top ribbon (the one in your right hand) across to wrap around the box horizontally.
Step 5: The Tuck & The Knot
After you wrap around and come back to the center of your gift, bring the top ribbon that is in your right hand under the horizontal and vertical ribbon to create a knot.
Step 6: The Bow!
Use the bottom and top ribbon in your left and right hand to create your perfect bow!
Happy Wrapping!
Labels:
Big Sis Tips
,
bow
,
gift
,
Holidays
,
perfect bow
,
wrapping
Subscribe to:
Post Comments
(
Atom
)


I just learned your page from a friend and hell yeah I’m
ReplyDeletegonna glance once in awhile on your page to see and read more of your works.
www.triciajoy.com