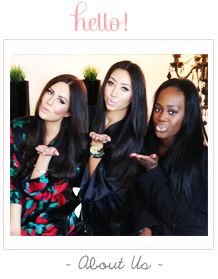
We love wearing fun lipstick colors! At first, it can be tricky to apply... how do you use lip liner?! How do you get it to last longer? We answer all of these questions, so you can have a pretty pout in no time.
1. Start with clean, hydrated lips. If you're wearing a dark color, exfoliate gently with a toothbrush before getting started. Add a light coat of chapstick or face lotion to moisturize.
2. Next, apply primer. We actually like using
MAC Pro Longwear Paint Pot in Painterly, which can be used as an eyeshadow primer as well! This will serve as a base to help that lipstick stay put. It will look lighter than your natural lip color, but not to worry-- we're adding the color back in!
3. Start lining your lips at the cupid's bow... the little dip at the top center of your lip line. You can draw the pencil in the shape of an "X" so it gets the lines at the cupid's bow in a straight line, as seen in picture number 3.
4. Now, line the entire lip shape! You can go slightly outside the natural lip line if desired for a fuller lip effect. Be careful to not go too far outside the natural lip line, as you want your lip shape to still appear well-- natural! We used
MAC Pro Longwear Lip Pencil in Staunchly Stylish. We love how versatile this color is, and the long lasting effects of this lip pencil formula!
5. After you've lined your lips, apply lipstick. Start by dabbing on, covering the areas lined by the pencil so it all blends together. For more precision (especially helpful when wearing bold or darker lipstick hues) use a lip brush instead of applying it straight from the tube. We used
MAC Lipstick in Twig. It's a great neutral shade for fall!
6. Once the lipstick is applied, blot your lips together. No need to "mash" them from side to side, simply blot by pressing them together.
7. Now, your lipstick is almost ready to go! But, we have a final step for extra long wear...
8. As the last step, apply a sheer layer of translucent powder. We used
MAC Prep + Prime Transparent Powder, which is a favorite product of ours that can be used on the rest of the face as well! Use a fluffy brush (like
this one by e.l.f.) to lightly dust a tiny bit of powder on top of the lipstick. For a skilled hand, this can be done directly on the lips. If you want to practice first (or if you have a heavy hand) use a 1-ply tissue instead of applying directly to the lips. Hold the tissue up to your lips, and dust the powder on top of the tissue. Adding the powder will add a slight matte finish to the look as well.
9. Smile, you're done! Your lipstick will be ready to go, and ready to take on the day with your pretty painted lips! If you're wearing a darker hue, stick your pointer finger in your pursed lips, and pull your finger out. This will help to remove any lipstick residue inside the lips, which can end up on your teeth... and nobody wants lipstick on their teeth!
10. Kisses.
Enjoy your long lasting lipstick! What are some of your favorite tips for applying lipstick? Share with us below!


